Putting Up: Beet Pickled Quail Eggs

Putting Up: Beet Pickled Quail Eggs

These Beet Pickled Quail Eggs, cheerfully tinted pink, are like a grown-up version of dyeing eggs for Easter. We first encountered these when a farmer friend, who was expanding into raising quail, started experimenting with pickling their eggs. Ever since sampling the results, we’ve been on a mission to duplicate what we remembered of them — bite-sized, protein-packed, and a delightful mix of sweet, sour, and spice. And cute, irresistibly you-can’t-eat-just-one kind of cute.

Putting Up: Beet Pickled Quail Eggs

To start off, we dropped by the Winter Farmers’ Market to pick up some quail eggs from Mona Farm. Before we could make our selection, though, a fellow customer swooped in and loaded up her basket by the dozens. When asked what she planned to do with them, she replied that she had them hard-boiled every morning for breakfast. Nutritionally speaking, they’re the same as chicken eggs, just a different portion size, with about 6 quail eggs the equivalent of 1 chicken egg. We imagine this woman’s daily ritual of quietly peeling each one as a kind of morning meditation, two being enough to suit her breakfast needs.

Putting Up: Beet Pickled Quail Eggs

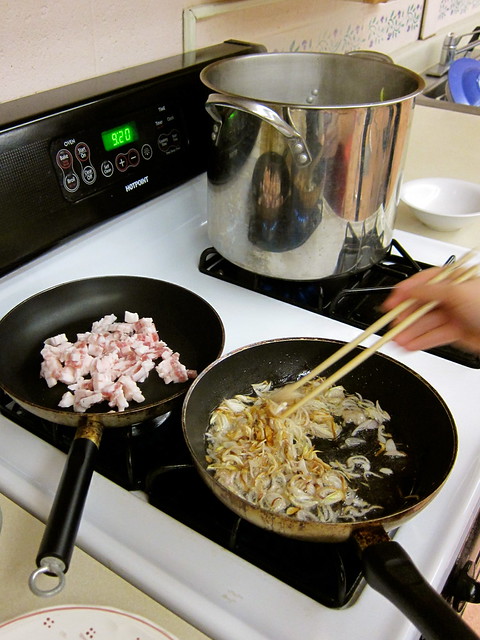
Preferably, quail eggs for pickling should be about a week old. Like chicken eggs, the fresher it is, the harder it will be to peel. To cook, place them in cold water and bring to a boil, stirring gently with a wooden spoon to help set the yolks in the center of the egg. Let them boil for 3 minutes, then immediately transfer to icy cold water to stop the cooking. To peel, as Maggie Beer instructs, “pick up the egg and crush the pointy end against the table so that the whole shell crazes in your hand. The skin should slip off in one piece.”

Putting Up: Beet Pickled Quail Eggs

Another method of peeling quail eggs is to soak them in vinegar. In a display of kitchen science, the calcium of the shell reacts immediately on contact with the vinegar in a riot of bubbles. First, the spots lift and float off, like decals. Then, in an hour or two, the shell is completely dissolved.

Putting Up: Beet Pickled Quail Eggs

This method is well-suited to eggs that are going to be pickled, but do make sure that you don’t leave them in their effervescent bath too long — two hours seem to be the maximum — or they’ll soak up too much vinegar and throw off the balance of the other flavors in the pickling liquid.

Putting Up: Beet Pickled Quail Eggs

After they’re done soaking, the quail eggs are left encased in a leathery membrane (above). To remove, pinch the membrane at the wide end, around where the air gap is, and make a tear. From there, the rest of the membrane can be gently peeled off. Once all of the eggs are peeled, swish them around in some cool water to rinse off any membrane left clinging, then they’re ready for pickling.

Putting Up: Beet Pickled Quail Eggs

We started with two dozen quail eggs, though the brine seems ample for three. Save the cooked beets and, if you like, pop them in the jar with the quail eggs; a red onion thinly sliced also wouldn’t be out of place. The quail eggs will be ready to eat after a day of pickling, better after a week, and we thought just right at after two. It’s not uncommon to find these stored on the counter, the vinegar takes care of keeping them safe, though with limited counter space, we keep them in the fridge. Like any pickle, they can be serve alone as a snack; we’re already imagining them atop a salad of the beets and a peppery green, such as arugula or mizuna, with a dressing made from their pickling juices, and a chunk of briny cheese on the side.

Beet Pickled Quail Eggs

2 to 3 beets, washed, peeled and cut into thin wedges
1 cup cider vinegar
1/2 cup sugar
1 teaspoon salt
1 to 2 bay leaves
1/2 teaspoon allspice
1/2 teaspoon black peppercorns
24 quail eggs

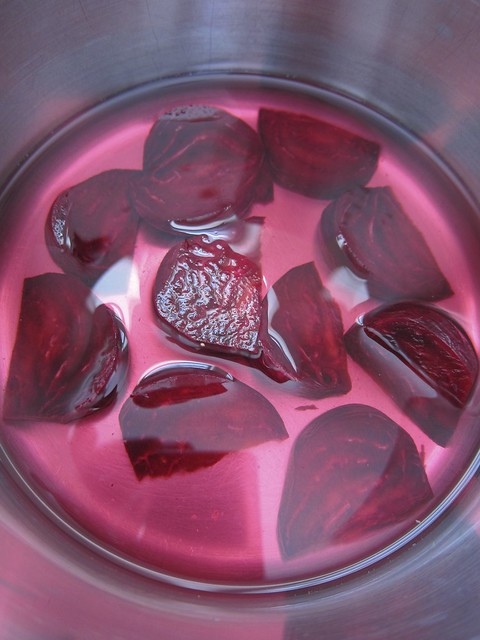
– Cover beets with cold water by 1 inch in a small saucepan and bring to a boil. Reduce heat and simmer beets, partially covered with lid, until tender, about 30 minutes. Transfer beets to a bowl with a slotted spoon (reserving them for another use), then measure out 2 cups beet cooking liquid, discarding remainder. Bring beet liquid to a boil in a small saucepan along with vinegar, sugar, salt, bay leaves, allspice, and peppercorns, stirring until sugar is dissolved. Remove from heat and cool pickling liquid completely, about 1 hour.
– While pickling liquid cools, cover eggs with cold water by 1 inch in a small saucepan and bring to a boil, stirring gently (to help center the yolks in eggs). Reduce heat and gently boil eggs, uncovered and undisturbed, 3 minutes. Pour off water and shake pan so eggs hit each other, lightly cracking shells. Cover eggs with cold water and let stand 15 minutes (to stop cooking and facilitate peeling). Drain and peel eggs. Alternatively, soak the eggs in white vinegar for 1 to 2 hours, then peel. Transfer peeled eggs to a glass jar, then pour pickling liquid over eggs. Let eggs pickle, covered, at least 24 hours.

Adapted from Epicurious, and “Maggie’s Harvest” by Maggie Beer.

Local ingredients: Quail eggs from Mona Farm; beets from Stout Oak Farm; and cider vinegar from Sewall Organic Orchard.

Posted in cooking, preserving | Tagged , , | 14 Comments

3.17.14 Winter Leeks + Ice-Bred Arugula

3.17.14 Winter Leeks and Ice-Bred Arugula

With spring just around the corner and seeds about to be started, it seemed unfair to leave the few leeks remaining in the ground any longer. As you see, they’ve soldiered on through the harsh winter hardly the worse for wear.

3.17.14 Winter Leeks and Ice-Bred Arugula

Though most of the ground’s still encased in snow, a gloriously sunny day drew us out to soak up the warmth, and throw back the covers on the garden beds. We found the soil dry as a desert and heaved some snow on top, where it’ll be found by the sun’s rays and replenish some needed moisture.

3.17.14 Winter Leeks and Ice-Bred Arugula

When all else has died back, what a delight to find these spicy sprigs of arugula pushing their way into the new season. A winter hardy variety from Fedco, Ice-Bred arugula survives low soil fertility, drought, and pests. Due to an unfortunate lack of production, it isn’t being offered this year, and we’ll have to remember to save seeds from our own planting. From Fedco’s 2013 catalog:

Ice-Bred Arugula OG (44 days) Open-pollinated. Brett Grohsgal crossed two excellent European heirloom strains in 1989 and has been selecting for cold-hardiness and vigor since. He’s bred one tough cookie here. Mid-ribs and whole leaves develop a lovely purple hue in winter freezes. Recovers in spring even if plant goes dormant under very cold conditions. Seedlings can stand drought, compete against weeds and don’t require high soil fertility. They were also 1–2 days slower to bolt than other arugulas in my spring-sown 2010 and 2012 plots. This is arugula with more bite, vigorous with complex full flavors. Seed in short supply, order early. MD-certified.

Posted in garden | Tagged , , , | 2 Comments

Stuffed Cabbage in the Trôo Style

Stuffed Cabbage in the Trôo Style

“I have tried it with various spicy and aromatic additions, tomatoes, bits of bacon, herbs and so on, but reject them all in favour of the Trôo simplicity of cabbage, good sausagement and butter. It has a pure directness that is just right, and cannot be improved.” — Jane Grigson

For the longest time we thought  Stuffed Cabbage in the Trôo Style, with it’s simple combination of cabbage and sausage, was Irish. As it turns out it isn’t, and we no longer need to wait for Saint Patrick’s Day to enjoy this warming casserole, and its melting  layers of tender cabbage and velvety sausagemeat.

Stuffed Cabbage in the Trôo Style

We used a mix of cabbages we’ve had in storage since last fall. The three greener, wrinkly ones are Savoy types, and the two yellowish ones are Gunma; neither are necessarily storage varieties, but have held up well. These both were sourced from Stout Oak Farm, and have been stored in covered bins lined with dry paper towels to allow them to breathe and soak up any excess humidity. The bins are stacked in our lightly insulated bulkhead, which hovers in the range of 36° to 39°F as winter progresses.

Stuffed Cabbage in the Trôo Style

A quick rinse after cutting, and the cabbage brightened right up, becoming crispy and sweet once again. The cabbage is then blanched in salted water for 5 minutes, drained, and run under cold water to stop them from cooking further. Once the cabbage has cooled, it’s gently squeezed dry.

Stuffed Cabbage in the Trôo Style

In a lidded casserole, the cabbage is layered with “good sausagemeat.” We used Sweet Italian from Brandmoore Farm made from their milk-fed pigs; it comes conveniently packaged without casing, and its light seasoning of fennel is just right for this dish. Some salt and pepper, and dabs of creamy butter are all that’s needed before it’s ready to go in the oven and time does the rest.

Stuffed Cabbage in the Trôo Style

As it slowly cooks away from prying eyes, a bath of savory juices forms, keeping everything moist while the layers of cabbage and sausage settle into one another. We served this cut into thick wedges with a side of mashed turnips with crispy shallots to sop up the buttery juices, and a big dollop of grainy mustard for extra spice. Like any good country dish, this one can accommodate what you have — in addition to a regular head of cabbage, Grigson recommends a Savoy or Dutch variety, or even a Chinese Napa one for a more delicate texture. As for its origins, it turns out this was a recipe from one of Grigson’s neighbors in the French village of  Trôo, who believed this an improvement on the classic chou farci.

Stuffed Cabbage in the Trôo Style

3 to 4½ pounds cabbage
1½ to 2 pounds pork sausages, removed from casing
Sea salt, freshly ground black pepper, and butter

– Heat the oven to 300°F. Cut the cabbage across into thick slices, about 1 inch wide. Blanch the cabbage pieces for in a large pot of boiling, salted water for 5 minutes. If using a more tender variety of cabbage, reduce the blanching time. Drain the cabbage and run under cold water to stop the cooking, drain again and gently squeeze dry.
– Butter a lidded casserole or deep baking dish. Place a third of the cabbage in the bottom of the casserole and season with salt and pepper. Place half of the sausage meat in a layer over the cabbage. Continue with another layer of cabbage then sausage, seasoning as you go, and finish with a last layer of cabbage. Dot the top with butter, cover the casserole or baking dish, and cook in the oven for 2 to 2½ hours. Serves 4 to 6, depending on appetite.

Adapted from “Jane Grigson’s Vegetable Book” by Jane Grigson, and “Good Tempered Food” by Tamasin Day-Lewis.

Local ingredients: Savoy and Gunma cabbage from Stout Oak Farm; sweet Italian pork sausage from Brandmoore Farm; cultured butter from Casco Bay Butter Co.; sea salt from Maine Sea Salt Company; and Farmhouse Garlic Mustard from Cheshire Garden.

Posted in cooking | Tagged , , , | Leave a comment

Vietnamese Cooking: Banh Xeo (Vietnamese Pancakes) & Banh Canh Tom Hum (Udon Noodle Soup)

2014 Vietnamese Cookery

Much of what we learn while cooking with others is found in the seemingly offhand remarks — this is how it looks, this is how it smells, this is how to tell it’s done. Born and raised in Da Nang, Rose Van recently led a series of Vietnamese cooking classes that gave our small group a chance to go beyond the recipe, explore a relatively unfamiliar cuisine, and learn firsthand some of the things that can only be conveyed in person. Over several evenings, we cooked and dined on a variety of Vietnamese dishes, including Banh Xeo, or Vietnamese Crispy Pancakes, and Banh Canh Tom Hum, or Vietnamese Udon Noodles with Lobster.

2014 Vietnamese Cooking 2014 Vietnamese Cooking

The ingredients for Banh Xeo, literally “sizzling cake,” included those for the pancake batter, the pancake filling, the dipping sauce, and the vegetable garnish. Above, left: Ground pork liver, ground pork, and lemongrass for the dipping sauce; shrimp, thinly sliced pork, and bean sprouts for the filling. Above, right: Green papaya and carrots for the pickle; scallions for garlic flavoring; and cucumber, lettuce, and a mix of fresh herbs (fish mint, mint, Asian basil, and cilantro) for garnish.

2014 Vietnamese Cooking

While frying up lemongrass and garlic for the dipping sauce, Rose explains how the addition of pork liver and ground pork is particular to the region around Da Nang, which sits midway between the North Central and South Central Coasts of Vietnam.

IMG_9687

Similar to crepes, the pancake batter is a thin mix of rice flour, cornstarch, coconut milk, turmeric, and minced scallions. To make the pancakes, the pan is left to preheat, then a slick of oil added. A few slices of pork are added to the pan, and sautéed until barely cooked. Next, batter is swirled into the still hot pan, making a sizzling sound as it coats the bottom of the hot pan.

IMG_9688

To complete the filling, several pieces of sliced shrimp and a small handful of bean sprouts are place on top of the pancake. The pan is then covered briefly to allow the filling to warm up.

IMG_9689

Once the cover is removed, the pancake is folded in half, omelette-style, and left to cook further until crispy and browned on both sides.

IMG_9690 IMG_9692

The pancakes are cooked one at a time, and everyone gets a chance to make them until we have a full platter.

2014 Vietnamese Cooking

Each pancake is cut in half, and rolled in rice paper with a choice of fresh garnishes — lettuce leaves, picked herbs, thin slices of cucumber, and a pickle made from shredded green papaya and carrots — creating a bundle of bright, clear flavors and contrasting textures, all grounded by a deeply savory dipping sauce spiced with snips of red chilies.

2014 Vietnamese Cooking 2014 Vietnamese Cooking

Banh Canh Tom Hum, or Vietnamese Udon Noodles with Lobster, is made with several different components: Hand-made noodles, pork broth, lobster broth and meat, fried shallots, and pork cracklings. Above, left: Sliced shallots left out to air dry before frying; Vietnamese mint, scallions, red chili, and lime for garnishing the soup. Lobster would have been prohibitively expensive in Vietnam, and crab or shrimp can be used in its place.  These were from a nearby lobster pound, and rambunctiously fresh. After a quick rinse, the lobsters were steamed, the meat picked, and the brothy cooking water saved for later.

2014 Vietnamese Cooking

For the pork broth, the ribs are chopped into bite-sized pieces, blanched and rinsed, then covered again with water. They’re simmered along with an onion for at least an hour, skimming all the while for the clearest of broths. It is then flavored with some of the lobster cooking water and seasoned with fish sauce to form the base of the soup.

2014 Vietnamese Cooking 2014 Vietnamese Cooking

Unlike the Japanese udon, which uses wheat flour, Rose uses a mix of tapioca starch and rice flour for this Vietnamese version. Despite the softening effect of adding boiling hot water, the dough is stubborn and is tamed only through patient kneading.

2014 Vietnamese Cooking

After a session of vigorous kneading, the dough has become silky and smooth. It’s allowed to rest, then rolled out by hand in small batches.

2014 Vietnamese Cooking

The noodles are cut into 2 to 3 inch long strips, about 1/4 inch wide, and will swell up when cooked.

2014 Vietnamese Cooking

The cut noodles are dumped all at once into boiling water, and left to set before stirring. As they finish cooking, they float to the surface, and are ready to be scooped out into a bowl of cold water. After draining and rinsing, they’re then reheated and held in another bowl of warm water, ready to serve.

IMG_9775 2014 Vietnamese Cooking

All that remains is to make the fried garnishes — pork fat is rendered into cracklings, and shallots are sautéed until crispy. The remaining oil and rendered fat are mixed, then heated with anatto to add color. The components waiting to be assembled (above, right): Lobster meat, minced Vietnamese mint and scallions, red pepper flakes, black pepper, and the anatto oil with fried shallots and cracklings.

2014 Vietnamese Cooking

Cooked noodles are placed in individual bowls, topped with each of the garnishes, and bathed in hot broth. Each spoonful of this fragrant soup is layered with a complex combination of flavors and textures — soft and slightly toothy noodles, tender morsels of lobster lending sweetness, chewy chunks of pork, and crispy shallots and crunchy cracklings. Separate bowls hold fish sauce flavored with red chilies to be added at whim, while mint, scallions and a squeeze of lime add their own distintctive notes. We’re told if there’s any broth leftover, to refill our bowls and sop it up with pieces of crusty baguette.

2014 Vietnamese Cooking

Special thanks to Rose for sharing these dishes from her homeland with us, and to Kittery Adult Education for hosting these classes. To find out more about Rose and the classes she offers, visit Van Vietnamese Cooking.

Posted in cooking, field trip | Tagged , , , | 4 Comments

2014 Seed Notes

2014 Seed Notes

“There is a natural flow to the years,
and gardens here to match.”
— Russell Libby, “Which Gardens to Plant”

As we plan for the next growing season, we’re keeping in mind our intention to simplify. It’ll be our seventh season, and we’re now turning our attention towards refining rather than expanding. Our new mantra: Grow less, and grow it well. It’s easy to get carried away by glossy seed catalogs that arrive at a time when we’re most susceptible, but paring down the planting list does have its benefits: a more manageable garden, less chance for loss and waste, increased space for rotating the beds, and allowing the soil to rest between plantings.

Using trial and error as a guide, we try to select what works best with our garden’s micro-climate, which consists of a long and cold spring followed by a short burst of summer warmth, then a prolonged and temperate fall ending with the first hard frost. We start seeds around mid-March, a later schedule than others, then hold them back while we patiently wait for the ground to warm up and the last frost to pass. Once things are in the ground, we can expect some extra growing time in fall that helps to make up for the late start.

Even so, there are some vegetables and varieties that simply require a longer season than we have. We try to choose things that work within these constraints, such as smaller sized tomatoes, eggplants, and winter squash, and depend on our local farmers’ markets to fill in the rest. Of the vegetables we dropped last season — beets, parsnips, eggplant, and salad turnips — it was also a question of space and timing. We did miss having our own eggplants, though, and it’s very brief shelf life makes it a compelling vegetable to return to the list.

Other ways of coping with with our garden’s particular needs is through buying seed from regional sources, and by saving our own from plants as they adapt. So far, we’ve been able to save seed from shell peas, filet green beans, 3 varieties of garlic, and 2 varieties of winter tomatoes. Still, like most gardeners, we can’t resist something new and we’re adding potato onions as this season’s challenge.

Key
BI – Botanical Interests
F – Fedco Seeds
HM – High Mowing Organic Seeds
K – Kitazawa Seed Company
SI – Seeds from Italy
SS – Seed Savers Exchange

Alliums (see also Leeks)
Rossa Lunga di Tropea (F); planted too late last season to fully develop, try a second time. Add Potato Onions (F); plant in fall, possibly with garlic. Perennial plantings of chives, garlic chives, and Egyptian Walking Onions. Some success with ramps; left as is to further establish.

Arugula (see also Salad Greens)
Narrowed last year’s list of 4 varieties to 2 — Arugula OG (F) for main season planting, and Ice-bred OG (F) for early spring and late fall/winter extension.

Asparagus
Purple Passion continues to out-produce Jersey Supreme; work on soil fertility and bed maintenance.

Beans & Peas
Masai filet green bean (saved seed); Cascine (SI), Aguadulce (SI), and Superaguadulce favas (SI); Green Arrow OG (F) and Coral (F, co-op members) shell peas. The 3 favas mature at different rates, Cascine seems to do best here and has longest season. Season too short for successive plantings of peas, plant all at one time this spring.

Brassicas & Chicories
Spring planting of Spring Raab (HM) and Fun Jen (F). Fall planting of Cima di Rapa Quarantina (SI), Hon Tsai Tai (HM), Italiko Rosso Chicory (F), Tatsoi OG (F), Puntarelle Stretta (SI), Catalogna Brindisi (SI). Selection depends on what else is growing at the time and how they’ll be cooked; refine list as we replace seed.

Carrots
Napoli (HM) for spring and fall/winter extension. Of all the carrots we’ve tried, this one seems to do the best for us; stores well.

Celeriac
Brilliant (F); smaller than usual heads last season, purchased new seed.

Chard
Rainbow (HM) for entire season; Fordhook Giant (HM) for fall/winter extension.

Cucumber
Boothby’s Blonde OG (F) for slicing; National Pickling or other purchased seedling for preserving.

Eggplant
Purchase seedlings for Fairy Tale or other small Asian variety. Pingtung Long (F), first time growing from seed, as back-up.

Fennel
Finale (HM) and Orion (HM), chosen for flavor and bolt-resistance.

Garlic
Phillips (F), Music (F), and Rossa di Sulmona (SI); all from saved seed.

Kale
Siberian (HM) and Red Russian (HM) for entire season; Lacinato (HM) for fall/season extension.

Leeks
Siegfried (F, co-op members) and Bandit (HM); plant only for winter/season extension as don’t cook with during early fall; overwinters left in-ground.

Peppers
Shishito Pepper (HM); vigorous producer, reduce to two plants. Peppers turn red as they mature, may be dried.

Potatoes
Yukon Gold (F); continue growing in containers. May change to Keuka Gold depending on this season’s outcome.

Radishes
For spring/summer: Valentine’s Day Mix (HM), French Breakfast (HM), Cherry Belle (HM), and Cincinnati Market (SS). For fall/winter storage: Japanese Long Scarlet (K), Miyashige White Daikon (HM), Watermelon (HM) and Green Meat (F). Refine list as we need to replace seed.

Rhubarb
Chipman’s Canada Red and MacDonald; need to divide.

Salad Greens
For spring/summer: Gourmet Lettuce (HM),  Gourmet Baby (BI), Farmer’s Market Blend (BI), Red Planet (HM), Misticanza di Lattughe SI). For fall/season extension: Winter Lettuce Mix (F) and Misticanza di Lattughe Autunno-Inverno (SI). Continue second season with Agretti (SI); seed heavily then thin.

Sunflowers
Italian White and Sunrise Lemon (HM).

Squash
Costata Romanesca Zucchini OG (F) and Zephyr (F) for summer; Zeppelin Delicata OG (F) and possibly Spaghetti Squash (HM) for winter; Tromboncino Summer Squash (F) as dual purpose summer and winter. We’ve still 4 Tromboncinos, well suited to winter storage.

Tomatoes
Sun Gold and one other cherry (purchased seedlings). Continue Aprile and John Forti’s Piennolo from our seed saved from last season. Drop Ponderosa, season too short to reach maturity before harvest, and prefer flavor of red varieties of these winter tomatoes.

2013 Seed Notes
2012 Seed Notes

Posted in garden | Tagged | 4 Comments

Torta Verde — Chard and Potato Tart

Torta Verde — Chard and Potato Tart

We’ve had this Torta Verde, a rustic tart from Liguria, bookmarked for years, but were always hesitant to tackle it because of the dough. It’s meant to be rolled out paper thin, as if it were a sheet of pasta, then filled with a savory mix of chard, potatoes, feta and eggs. This was as much a way to make the flour go further as it was for its aesthetic appeal. It wasn’t until we came across a video of another version of this tart that we understood the dough’s particularly stretchy qualities, or, in baker-speak, it’s extensibility.

With this in mind, we chose to use King Arthur’s Italian-Style flour for this torta. It’s an American version of what is known in Italy as 00 flour, and its low protein levels makes for a silky dough that is easy to shape, and bakes up light and tender. The dough will be easier to roll if you let it rest in the refrigerator for at least two hours, even better overnight. Traditionally, the torta should be even thinner than we’ve accomplished here — we’re still getting the hang of working with this supple dough. In keeping with this tart’s frugal origins, we used some leftover spinach in place of the chard; just make sure that whatever green you use is thoroughly drained. Though the torta was considered “poor people’s food in the Ligurian backcountry,” the delicious results are anything but.

 Torta Verde — Chard and Potato Tart

Dough
1¼ cups flour, sifted
½ teaspoon salt
1½ teaspoon extra-virgin olive oil
½ cup water

Filling
8 to 10 large leaves Swiss chard, stems removed, leaves finely chopped
Sea Salt
1 medium potato, boiled, peeled, and finely diced
1 medium yellow onion, peeled and finely chopped
2 tablespoons minced fresh flat-leaf parsley
1¼ cup crumbled feta
Sea salt and freshly ground black pepper
2 eggs, lightly beaten
2½ tablespoons extra-virgin olive oil, plus more to brush crust

To make dough: Mix together flour and salt in a large bowl. Drizzle oil into flour, mixing with a fork, then sprinkle in up to ½ cup water, 1 tablespoon at a time, mixing until dough just holds together. Knead dough until smooth and elastic, about 15 minutes. Shape dough into a ball, wrap or cover, and refrigerate for 2 hours, or overnight.
To make filling: Put chard into a colander, sprinkle with 1½ tablespoon salt, toss to mix, and set aside to drain for 20 minutes. Meanwhile, mix together potatoes, onions, parsley, and feta in a bowl, and season to taste with salt and pepper. Press chard against the colander to squeeze out juices, discard the juices and add chard to potato mixture. Mix in eggs and 2½ tablespoons oil and set aside.
– Heat oven to 375°F. Roll out dough until 18″ in diameter, and place on a piece of parchment paper cut large enough to fit a 14″ pizza pan. Place the filling in the center of the dough, and spread to within several inches of the edge of the dough. Fold the edges of the dough over the filling and towards the center, forming overlapping pleats; gently press the tart to fill the edges. Slide the parchment paper with the tart onto the pizza pan, and lightly brush the edge of the crust with additional olive oil. Bake until golden, about 35 minutes.

Adapted from “Saveur Cooks Authentic Italian” by the Editors of Saveur Magazine.

Local ingredients: Spinach (in place of chard) from Hollister Family Farm; Yukon Gold potatoes from Riverside Farm; onions from Black Kettle Farm; feta from Flying Goat Farm; and eggs from Mona Farm.

Posted in cooking | Tagged , , , , , , | 12 Comments

Juliette of the Herbs

“One of the main purposes of having gardens is that this garden is your teacher and your friend.” — Juliette de Baïracli Levy, “Juliette of the Herbs”

We’ve long been enamored of the culinary uses of herbs, and a recent illness has us more closely considering their healing powers as well. A little research led us to this film on Juliette de Baïracli Levy, an English herbalist who gathered her vast knowledge of the subject from peasant cultures around the world, with a special interest in Gypsy lore. Here in Maine, we’ve a direct link to this remarkable woman and her teachings through the equally inspiring Deb Soule of Avena Botanicals, who learned from Juliette firsthand.

Posted in interlude | Tagged , | 2 Comments